I was recently asked by some of this blog loyal reader that I should make a post on how they can add a beautiful drop-down menu to their blogger blog.
Presently, there are many ways to add a drop-down menu to blogger blogs but most of these methods are sometime complicated or wrong. So today, a simple and easy method will be explained here on how a beautiful drop-down menu can be added to blogger blogs and how you can easily customize it to your taste.
1. Go to Blogger Dashboard ==>Template ==> Edit HTML
2. Now search for ]]></b:skin> in your template. This can be easily searched for by using CTRL + F.
3. Paste the code below above the code stated in the 2nd step.
.menu{

border: 2px solid black;

margin:0px;

padding:0px;

font: 67.5% “Century Gothic”, “Bitstream Vera Sans”, “Trebuchet Unicode MS”, “Lucida Grande”, Verdana, Helvetica, sans-serif;

font-size:15px;

font-weight:bold;

}

.menu ul{

background: pink;

height:35px;

list-style:none;

margin:0;

padding:0;

}

.menu li{

float:left;

padding:0px;

}

.menu li a{

background: pink;

color: black;

display:block;

font-weight: normal;

line-height:35px;

margin:0px;

padding:0px 25px;

text-align:center;

text-decoration:none;

}

.menu li a:hover, .menu ul li:hover a{

background: black;

color: lightblue;

text-decoration:none;

}

.menu li ul{

background: pink;

display: none;

height:auto;

padding:0px;

margin:0px;

border:0px;

position:absolute;

width:225px;

z-index:200;

/*top:1em;

/*left:0;*/

}

.menu li:hover ul{

display:block;
}

.menu li li {

background: ;

display:block;

float:none;

margin:0px;

padding:0px;

width:225px;

}

.menu li:hover li a{

background: ;
}

.menu li ul a{

display:block;

height:35px;

font-size:12px;

font-style:normal;

margin:0px;

padding:0px 10px 0px 15px;

text-align:left;

}

.menu li ul a:hover, .menu li ul li:hover a{

background: lightblue;

border: 0px solid black;

color: black;

text-decoration:none;

}

.menu p{

clear:left;

}
Click Here For Guide on How To Customize This Section
4.Now save your template then go back to “Layout” and add an “HTML/JavaScript” widget. Then copy and paste the code below into the “HTML/Javascript Widget” box:
    <!DOCTYPE html PUBLIC “-//W3C//DTD XHTML 1.0 Strict//EN”

    “http://www.w3.org/TR/xhtml1/DTD/xhtml1-strict.dtd”>

    <html xmlns=”http://www.w3.org/1999/xhtml” xml:lang=”en” lang=”en”>

    <head>

    <meta http-equiv=”content-type” content=”text/html; charset=utf-8″ />

    <title></title>

    <link rel=”stylesheet” href=”menu_style.css” type=”text/css” />

    </head>

    <body>

    <br>

    <br>

    <div class=”menu”>

    <ul>

    <li><a href=”#” >Home</a></li>

    <li><a href=”#” >About Us</a></li>

    <li><a href=”#”>Recipes</a>

    <ul>

    <li><a href=”#”>Breakfast</a></li>

    <li><a href=”#”>Lunch</a></li>

    <li><a href=”#”>Dinner</a></li>

    <li><a href=”#”>Dessert</a></li>

    </ul>

    </li>

    <li><a href=”#”>Photography<br />

    </a>

    <ul>

    <li><a href=”#”>Babies</a></li>

    <li><a href=”#”>Families</a></li>

    <li><a href=”#”>Seniors</a></li>

    </ul>

    </li>

    <li><a href=”#”>Crafts</a>

    <ul>

    <li><a href=”#”>Scrapbooking</a></li>

    <li><a href=”#”>Kids Crafts</a></li>

    </ul>

    </li>

    <li><a href=”#”>Contact</a></li>

    </ul>

    </div>
    </body>

    </html>
Click Here For Guide on How To Customize This Section
5. Finally, drag the widget to the area where you want it to show.
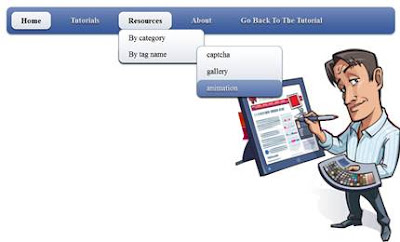
If you follow this tutorial carefully, you should have something related to the image shown below:
Use the comment box for questions and suggestions.